Showing posts with label Projects. Show all posts

Sunday, March 16, 2014

The New Brooder...

We needed a larger brooder set-up in order to house the larger number of chicks we have in each batch this year.  We needed a secure, warm area to get the chicks ready for their movable pens which takes about 3 weeks from time of hatch.  So we built this structure to house the chicks and then we built an inner box with legs that houses a heat lamp to warm the chicks.  We also have a creep feeder built into the wall of the brooder that features a gutter for the feeder trough at the bottom, angled 2x6s, and plywood to keep the feed contained. 


The new brooder is on the left, the older chicken coop (with a fresh coat of paint now) is on the right.


 Inside the hover box, there are 2 heat lamps to keep the chicks warm.  The bulbs can be changed out for less wattage for less heat and the legs can be set on top of blocks to reduce temps as well.  


So far so good with this design and arrangement.:)  Chicks seem happy and warm.

Saturday, March 15, 2014

A Couple Odds and Ends...

We planted our seedlings a few weeks ago, and they are coming up nicely so far!


Sunshine got her closet drape all sewn up.  It looks great, and the fabric was really great to work with too.


We are also working on a mural in the boys room that is a simple silhouette hunting scene.  I will have to show pictures when we get it done.


Tuesday, February 4, 2014

Don't Know When to Quit...

The remodel has expanded, and expanded some more.  Maybe it was the progress in the bathroom that inspired us.  Seeing those new walls all nicely painted and the new flooring so nice and new.  We expanded the remodel efforts to Sunshine's room a week or two ago.  Mind you, the bathroom still is not finished, it is 2/3 functioning though.  The tub/shower and toilet are functional, but the countertop is still not done and therefore the sink is not functional.  We will get there, but first we decided to expand the remodel to not only Sunshine's room but the hall that connects the bathroom and her room.  Then we figured why stop there?  Within the next 2 days we were starting in on the living room.  Then we realized it made more sense to keep going into the original dining area while we were at it.  Then since that area connects into the kitchen we will have some blending to do into the already remodeled kitchen as well.  Which means we will have to repaint the kitchen since the feathering out of the joint compound and texturing to blend the transition will require some paint touch ups.

We've possibly  bit off more than we can chew. Ha Ha   Well maybe not, we are gnawing and chewing as fast as we can.  It is coming along really quickly thanks to a VERY motivated and energized Mr Wonderful! He is on a mission and working late into the night several nights already. Thankfully his work schedule has been fairly light lately so he is able to put some more focus into the remodel than he'd have normally been able to.

We are currently on the 2nd coat of mud (joint compound) on the walls.  It feels great to be this far and I can't wait until the end result.

We extended one wall out to give us more options in arranging furniture in the living area, on the backside of the new wall we want to install a new woodstove at some point down the road.  We took out a short wall that had openings in it that we didn't care for.

BEFORE:  The wall behind Tobers got tore out back to the door.  The wall Tobers is working on got extended a couple feet and the opening was filled in.  You can see the "lovely" two tone paneling and painted wallpaper covered sheetrock board walls.


DURING (sneak peek):  You can see the short wall section by the door is now gone, and the other wall is longer and the opening is filled in now!  Woodstove will go behind this wall, so the wood mess isn't facing the living room area.  The sheetrock is up but we hadn't started the joint compound quite yet.  We added bullnose corners for something different.


While we were doing the remodel we realized we are going to need to replace the flooring in both the living area and kitchen.  The living room carpet is very cheap (short fibers and light colored and shows every stain).  The kitchen floor is sort of a disaster because the old old floor is showing in areas where we had to move base cabinets to make the kitchen larger in that remodel project.  So we have some rugs carefully placed to cover those bad spots, they catch all kinds of crud in those areas where the flooring gaps so it really needs replaced.  We were making due and being patient while we saved up the funds to replace it.  We decided to go ahead and get it done sooner than later after we finish redoing the walls.  We had the time and we couldn't work on much else with the cold weather and snow we've been having.  We filed our taxes and know what our refund will be when it arrives.  So as soon as that is in we can order our flooring.

I will keep you posted and hopefully we will have some final after pictures to share soon.

Tomorrow is Spud Man's 13th birthday!  I can't believe we will have two teenagers now.  Looking forward to many good times ahead and fun adventures as these kiddos grow into adults.

Tuesday, January 28, 2014

Tree Fort...

The tree fort has really taken shape this week!  The boys have been working really hard on it and it is quite impressive.  They have to give a big shout out to their Uncle Ray for bringing them supplies the other day.  The really brought their progress into high gear after they got materials.

They are having a great time up there even though the temps have been pretty cold these past couple weeks.  To be honest I haven't been up there yet, but Mr Wonderful tells me it is already full of all kinds of stuff.  I wonder if it looks anything like their bedrooms.  Surely not.

Whippersnapper has a BB gun up there.  Notice the window boxes!  That will look really cute with flowers this spring.

They still have the railing to finish and a few finishing touches, but it is pretty functional already.  They are really excited that they got this far too.


So there is the latest from the tree fort.  Maybe next time I will get brave and go take pictures inside of it too.

Monday, December 23, 2013

Bathroom Remodel Progress...

Here are a few of the BEFORE pictures.  Everything was very worn, pretty grungy, and dated.  There were holes in the sheetrock from the door knob, many holes from old towel bars no longer there, an old mouse hole in the corner,  mildew in 2 small areas inside the wall, and outdated lighting.


Sunshine has been working on refinishing the antique washstand to use as the new vanity.  We wanted something unique and interesting to use as the vanity and not just a stock vanity from the local Home Depot.  It has a curved front and some fun details that help add some character.  I let Sunshine take the initiative on refinishing it.  She is learning a lot and I think she has caught the "upcycling" bug after working on this project.  She has gotten the old finish stripped off, sanded it down, and painted it a nice barn red color.  She is really good at painting things like this, she has the patience and attention to the little things to deal with all the details on this piece.  We distressed some of the high wear areas and added stain over the top of the paint.  It added the rustic look we were shooting for.  

Here are some pictures from the progress on the remodel of the bathroom.


We still have to pick out the hardware and figure out the countertop choices for the vanity.  We are actually leaning towards a unique penny countertop.  Here is a picture of it laid out on a portion of the top to get an idea of how it might look.  We'd cover the pennies with an epoxy finish so it would be smooth and easy to clean.  It is growing on me.


Here is the enthusiastic demo crew.  Actually they LOVE to do demolition.  Here Spud Man is wishing I'd quit taking pictures and hop out of the way so he could get this piece out the door and Tobers is in the background.  It was only the 100th picture of the day, I am not sure why he was getting annoyed. haha


Until the next update!

Wednesday, December 18, 2013

Winter Projects...

We are excited to have Mr Wonderful home more these days.  Which in turn means more family quality time and more project time!  We have a few projects we hope to complete this winter.

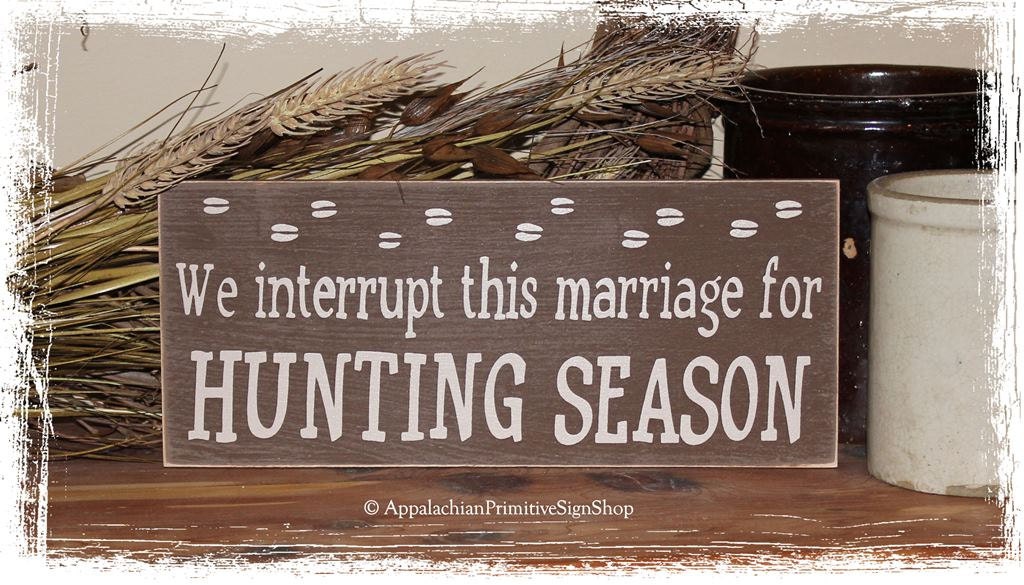
First of all we are working on a bathroom remodel.  I so wisely decided that a few weeks before hunting season was a good time to demo the kids bathroom.  Someone should have reminded me of this little sign before I went and let the kids rip out the bathroom.

We Interrupt This Marriage For HUNTING SEASON -Wood SIGN- Deer Hunter Home Decor Valentine's Day Gift
I've been thinking seriously about buying this sign off Etsy for our fall decor!  Check it out here .

Anyway, on with the story.  So the bathroom was demolished, down to the studs, wires and plumbing.  To ease the eye sore we put the shower curtain up along the bathroom wall to hide the mess.  I have to give myself some credit here, we did leave the toilet functional until this last week when we needed to get some demo done behind it.   There it sat a disaster.....the tub was still partially full of yet to be hauled away sheetrock pieces for a couple months.  Hmmm, well my patience got a work out as we progressed through 4 hunting seasons, weddings, hog butchering process, more hunting (you get the idea)!  Then finally, slowly but surely, progress has started in the right direction on the bathroom remodel.

So that is the #1 goal for this immediate time, get back to 2 fully functioning bathrooms...because Sunday mornings are interesting with 6 people sharing 1 bathroom!

#2 Goal~ Finish all the trim work in the kitchen.  We still have a custom range hood to design and install, lots of crown molding on the tops of cabinets, window trim, base cabinet end caps and snack bar trim work to complete.  It won't take long once we get all the wood stained and ready and a free weekend to get it completed.

#3 Start work on the shop project, even if it is just getting the plans figured out and footings dug!  We NEED a more enclosed shop.  I am afraid our investment in tools is going down the drain as they get weathered each month that passes.  Having them under a roof is good, but walls around them would be much better, especially on those wind/rain/snow days!  We need a secure place to keep our tools and supplies and it is beyond time to have a place to keep the extra freezers and frig.  Having 2 large freezers and an extra frig in the house is proving to be a little noisy at night and not very aesthetically pleasing to look at.  What is supposed to be the dining or breakfast nook in our house is full of appliances instead!  This project might have to be something we do in stages to be able to afford getting it done.  Slab first, walls/windows/doors second, wiring third etc.

#4 Fencing projects.  We need to get a few fences more fortified around here.  The back property line fence needs some serious work, the deer have really torn it up and broken every hot wire we've try to put up.  So we need something stronger, taller, and more imposing to discourage the pesky deer from using the orchard trees to remove the velvet from their horns next fall!  grrrr  We'd like to work on some more defined corrals and possibly shelters for the horses, add a couple more pens to be able to board more horses for additional income or for our own horse one day.

#5 Find my go get'em energy and motivation to do a lot of it with the kids so Mr. Wonderful won't have all the burden of trying to work on projects.

That should bring us into spring projects and I can't even think about those yet, so we will focus on getting these few things done first, heck even getting started on some of these winter projects would be good!

Tuesday, December 17, 2013

Power to the Chicken Coop...

The chicken coop needed power to it.  Coiling up an extension cord every time we needed to mow was a real pain.  So we decided to dig a ditch to run electricity to the coop.  We offered the boys a per linear foot price to dig the ditch for us and Tobers took us up on the offer.  He diligently dug that ditch and got it done for us.  


It will be so nice to be able to plug in the heat lamps for the chicks and keep the water defrosted with the poultry water heater.  Spud Man also dug a ditch to the main pasture gate where we have the electric fence charger.  Having those power outlets available outside will be so nice for years to come!

Thursday, August 1, 2013

Front Flowerbed Fun...

We've been weeding, and weeding, and weeding some more.  This week it was the front flower bed, again, for the 5th time this season.  We didn't have enough in the landscaping budget to put too many perennials in the front bed this spring so we filled it with sunflowers and gourds to help cover some of the bare areas.  So far that plan is working out pretty nicely.

Here is an overview of what it looks like from the house looking towards the road.


Here is what this same section looked like just 1 month ago...


The next few pictures are the rest of the front flower bed sections.


Here are some close ups of our favorite sunflowers.  They are so cheerful and fun!


Aren't they beautiful?  The honey bees sure like them!

Here are some of the gourd selection we ended up with.  They are pretty fun and they will make great fall decor additions!


That is the progress on the front flower bed so far this year.  I like the looks of it so far, I will enjoy adding in some shrubs, evergreens, and more perennials next spring, but for now this was a fun way to fill up the larger spaces.

Thursday, May 23, 2013

The 2nd Movable Chicken Pen Project...

I really enjoy working on projects involving lumber and tools.  I even think someday I might enjoy learning again to weld, and maybe even use a plasma cutter too.  There are so many projects I'd like to try and skills I'd like to improve on. The metal fabrication skills would likely go well with the woodworking in making some neat things.  I enjoy being creative as well as practical.

Last week we started with this....a few boards on the ground.


By the end of the day we had it this far.  A great start for sure.


When we got a chance to work on it again a day or so later we got it completed and moved to the field to begin it's life of usefulness.  We haven't gotten around to getting the chickens into it yet, it was all we could do to move it from the carport area to the field.  Whew, what a chore.


This area is where the water bucket for their waterer sits perfectly.  Also, there is an extra slot for food storage or other items.  Which will come in handy.


Overall it took about 14 hours of working on it to get this completed, as well as a couple trips to Kelly Lumber Supply to get what we needed.  This movable chicken pen is larger than our last one.  The last one I made 8'x8', and this one is 8'x10'.   Between the two pens we will be able to house 95 meat chickens (42 in the smaller one, 53 in the larger one).  It is heavier and bulkier to move, but still we are able to move it OK with 2 people just like we move the other one.

This pen should be all we need to get through the remaining of our chicken production season.  The first chicken tractor cost us in the range of $50, this larger one cost about $75 because we had to buy more products new than the first one.  We had so many scraps and used things on hand for the first one it was down right reasonable to build.  I still don't feel like $125 total for both pens is bad at all.  I appreciate so much when Mr. Wonderful brings home salvaged lumber, supplies, and parts!  It is the equivalent of a bouquet of flowers for me I think. 

Only problem is, working on a gravel surface is proving to be a little painful to the knees.  For Mother's Day the kids got me a foam knee pad for gardening which I use when I need to work on projects now.  It is most helpful!

I think one of the things high on the priority list is to get our shop area enclosed.  Right now it is an open hay shed/carport and soon it will be a 22x36 workshop with an open carport area.  I have a dream about what it will look like inside, and how organized it will be.  Everything would have a place, because right now, nothing has a place and your guess is as good as mine as to where I might find something.

 It will be really exciting to design a nicely functioning workshop.


Friday, May 10, 2013

The Farm Binder...

How do you keep information organized and accessible when you need it?  That is what I had to figure out recently.  With all the details I needed to keep track of with these farm projects I needed a central location to organize everything.  I am not a naturally organized person, it is something I had to learn and force myself into at first.  Now I appreciate the work in setting it up, because I am confident where the information is at all times.  It takes about 30 mins. to 1 hour per week updating it to keep things current and organized.

I set up a farm binder.  It helps me manage the farm projects quite well.  Actually, I make it help me manage things, since the binder doesn't do anything if I don't.   This 3" binder has everything we need...


 Goals are the first page to keep us focused!  We have a giving record/farm tour record inside the front flap to keep track of how we've been able to do with our #1 goal of blessing others by giving, sharing experiences, sharing the bounty, donating cash etc.   That giving log is my very favorite to add entries into!


There is a calendar so I can keep track of when I need to order things, how old the meat birds are, when to move them onto pasture, when our chicken processing dates are, when we planted what seeds, when to plant what into the garden according to last frost date etc.  It really feels a little like my 2nd brain some days.


Each farm category has it's own balance sheet where I keep track of expenses and income.  There is one for broilers, turkeys, rabbits, laying hens, garden, fruits, hay/pasture, horses, pigs, and farm improvements.


We also have a large envelope hole punched and put in the binder to keep track of all our receipts for the year.  So when tax time comes around we aren't scrambling!  We write a quick note on each receipt before popping it into the envelope.


We keep track of a few memories and farm improvements with picture pages.  I can see this being a keepsake as well as record of important info.  We will always have this 2013 binder to look back on our first official year with our farm adventure!


 The most valuable part is this handy little log I started around the first of the year.  This is the daily log where I keep track of what we are learning, some issues we run into and how we solved them, what the animals are being fed and how much, figures for future projects.  It serves as a journal of what we've accomplished as well.

Here is the daily log.
I put tabs along the bottom to section it off into the farm project categories.


Here is a page from the pig section.


Hopefully I stay on track and keep track of all the info for the year.  It has been enjoyable so far so I expect I will be able to keep it up.

Hope you enjoyed the peek into how I keep things organized around here!


Monday, April 8, 2013

The Chicken Tractor for the Meat Chickens...

I have been racing a time deadline these past few weeks.  We have had Cornish X chicks in the brooder house for 3 weeks and I only had 1 week left until they really needed to be out on pasture for the whole pastured poultry aspect of raising naturally raised chicken.  We had them out during the day in the old laying hens pen where there was just a little forage but we really wanted them out and getting more fresh air, sunshine, and getting to feast on bugs and fresh greens like a healthy chicken should.  Problem was I was so busy!  I was having trouble finding the time to get it built.  Note to self: Make sure to have whole set-up ready before chicks arrive!  Because who knew they'd grow THAT fast?!

Here they are at 3 1/2 weeks old!

I was finally able to set aside enough time to build it several afternoons this past week.  The kids and I got started on the schooling earlier than normal and we abbreviated some topics so we could get to the project sooner each afternoon.  Surprisingly it only took 2 afternoons!

It is modeled after the design suggested in Pastured Poultry Profits a book by Joel Salatin.  Salatin is a well respected farmer who is forging the way for small scale farmers world wide.  I have enjoyed reading his literature and gleaning ideas from his thought processes.  My favorite book so far from him is You Can Farm The Entrepreneur's Guide to Start and Succeed In A Farming Enterprise.  He recommends a chicken tractor that is 10x12 feet but we opted for an 8x8 size because that was the standard wood length for the materials we wanted to use.  Anything longer than an 8 foot 2x2 board starts to look more like a corkscrew than a straight board.

It was made with mainly 2x2s for the uprights, 1x4 boards, and some various bracing, L brackets and many many screws in all different lengths.  We used salvaged metal roofing on the tops for the sheltered area, we used thin plywood materials on the sheltered sides for wind/rain protection.

So here is the finished product.


The front view.  You can see sections of yellow hose on the ropes we use to move it.  The hose is a hand-saver, it is so much easier to hold those ropes with a nice thick hose over it than it is to have ropes digging into your fingers.  The front one we put a hook to keep the handle off the ground and out of the chicken poo as it is moved around.  The top doors are held down with bungee type ropes that are hooked to the same eye-bolt that the handle to move it is tied to.  We have the tractor positioned in our orchard to keep the grass and bugs down around the trees.  It is an area that is about 210' long by 45' wide.  We have the laying hens' tractor positioned along the outside edge of the orchard fence so we will have a nice buffer area around the hay field so the swather operator won't need to try to get too close to fences and irrigation risers.;)


Here is a back view, I was using what I had available that had been salvaged so the back is 3 sections of thin plywood.  The middle one can be removed with about 6 screws to use as a door at some point if we wanted to.  The side is about 2/3 covered with plywood to give the birds somewhere to get out of the wind or the wind driven rain.;)  We also hung a 75watt flood light in that area so we could turn it on for the particularly cool or windy nights as a place for them to huddle and stay warm.


Getting it all set up and ready for the birds.  


We wanted the water bucket secure because we get high winds around here.  The original design showed the bucket sitting on top of the structure but I was afraid as the bucket emptied it would blow off or get jostled when we moved it.  So we dubbed off one corner of the structured opening for the access doors with supports and nested the bucket into the structure a little.  The red dots you see in the bottom of the bucket are what are called nipple waterers.  The chickens have taken to it quickly and it keeps their water more sanitary and prevents them from kicking stuff into the water supply, pooping in it, or knocking it over.  I also like that it doesn't sit on the ground and take up square footage that the birds can forage.  We had to design the door on that side to fit around it.  It turned out to be the perfect placement to fill it easily, and lifting it to that height is easy too!  We purchased a lid for the bucket so that nothing can fall in as well.


Here are a couple more pictures of the bucket water assembly.  You can see on the bottom of the bucket the little nipple fittings they just peck at them a little and the water dribbles out and they quickly figure out that is where water comes from.  I am pleased with this design so far.


Here the chickens are getting used to the new set up.  You can see the light hanging for supplemental heat the first week or two they go out and during storms.  You can also see the long handled feeder they they are all over!


It never takes them long to find the feeder!  Here is the other creep feeder on the one side.


 So far the chickens seem to like the new set-up and are doing well.  We have had a few very windy days and it is staying put and the chickens are using the sheltered corner as planned.  We have 44 chickens in this pen.  We figured in the future we should probably plan to have 42 chickens per 8x8 pen but so far they seem to have plenty of room.  They are still relatively small so we will work on getting another pen built in the next couple weeks.  We have 60 chicks coming this week for 2nd batch and they will need a little more room to spread out when they are older.

This was our prototype and honestly I am not sure I will change much on the next one.  Which is a wonderful sign that this one was a success!